How to upload images in a posting in the forum?
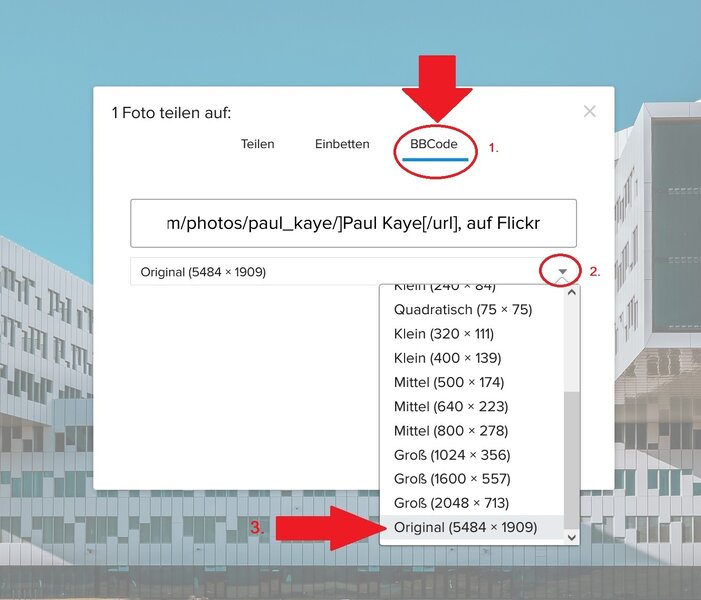
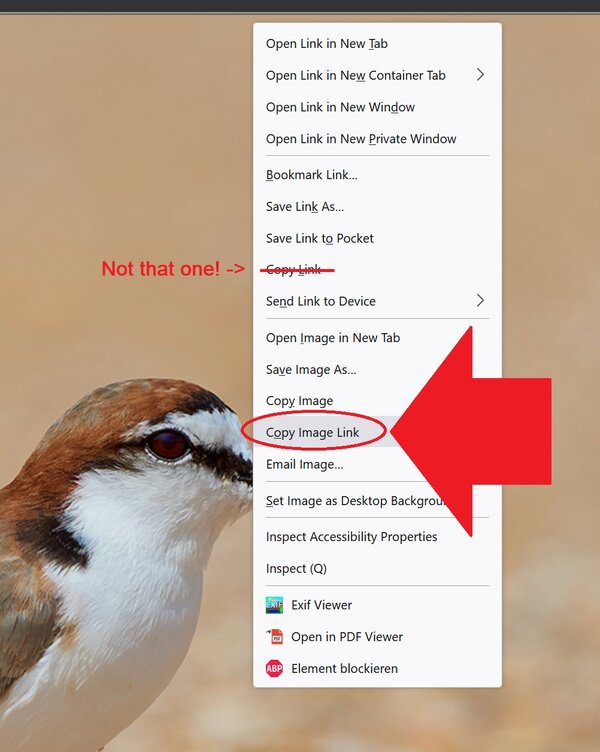
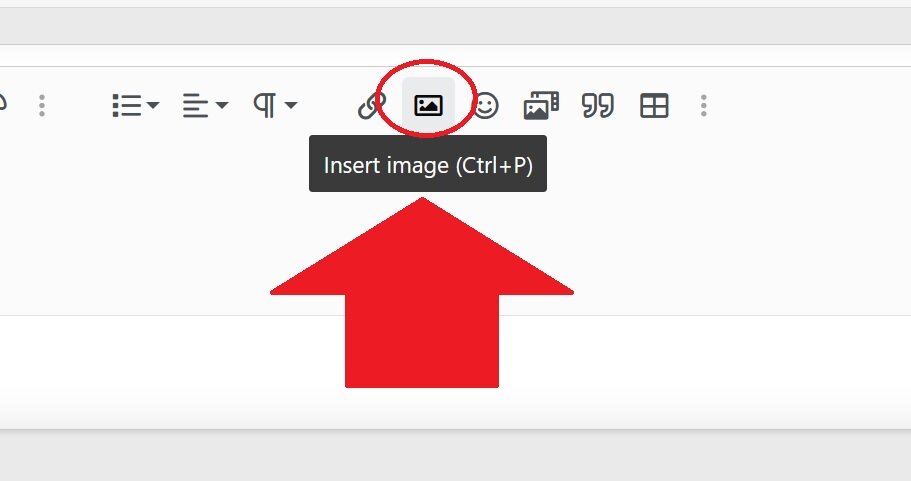
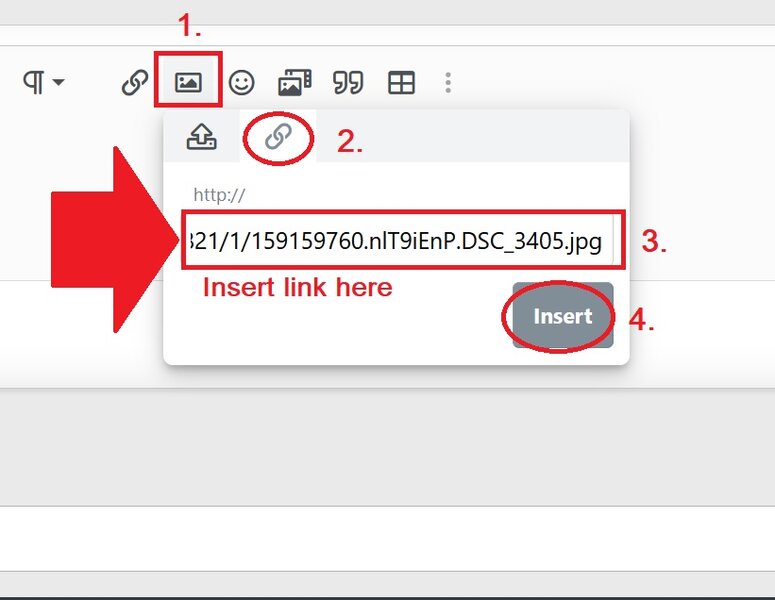
You can do it in two different ways. Either you embed an image from an external server (copy & paste the URL, depending on your webhoster) or you upload it with the upload functionality on our server.
A. Upload it on our server
1. Click on "attach files" below the textbox here in the forum
It looks like this at the moment:
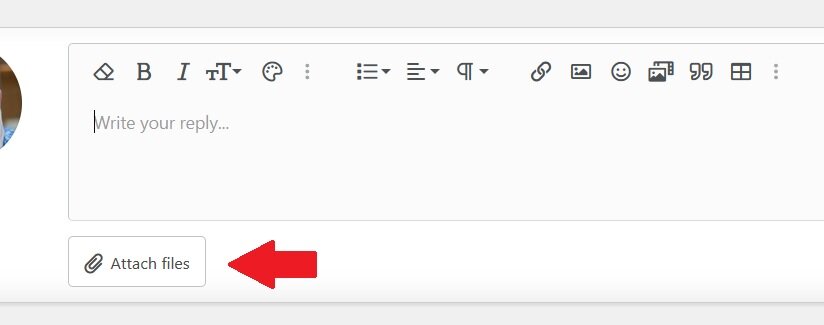
Attention: The upload limit restrictions in KB and pixel size on the horizontal side my vary over the time. They depend on your user level, whether you are a Patron or not etc.
You can find an overview of the current settings for the different user levels here.
2. Choose in the next pop-up window the photo/photos on your PC you want to upload here
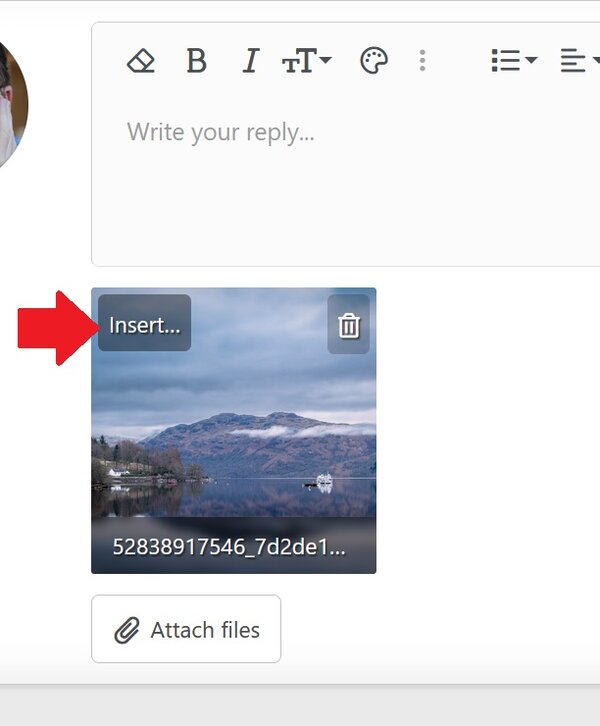
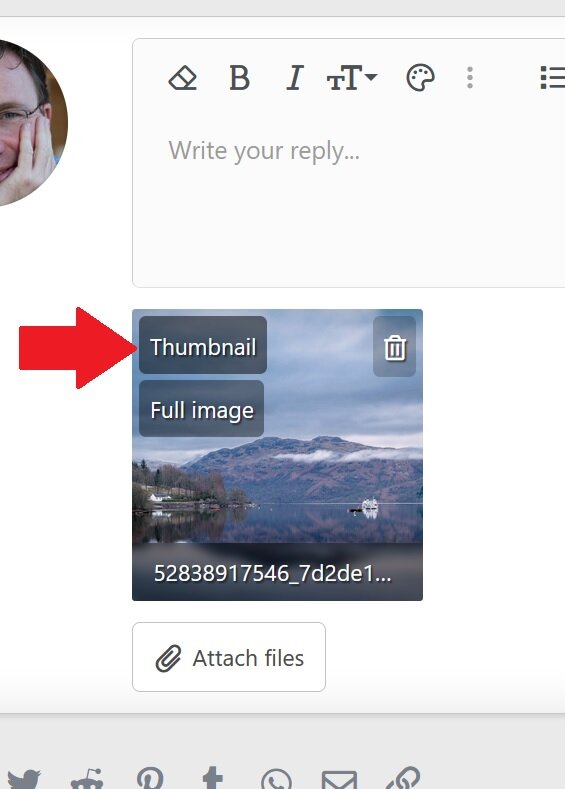
3. a) After uploading move your mouse over the image... click on the upper left hand corner of the image on "Insert...",
-------------
3. b). ...after that on "thumbnail" to display the image on that spot where the cursor was. See screenshot below.
-----------------
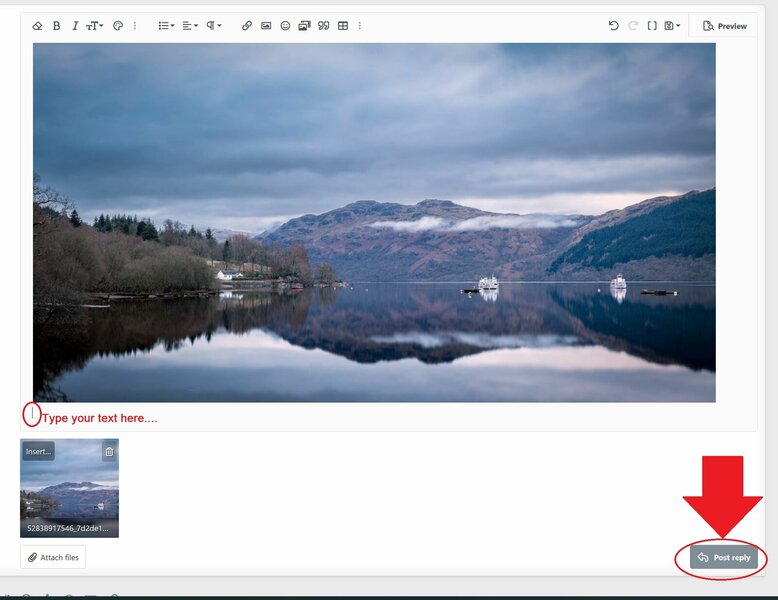
Thumbnails are pretty big here. Around 600 pixel at least. See below:
----------------
Now your images will be displayed at the spot you put the cursor beforehand in your posting. Hit "reply" to publish it. The forumsoftware does the resizing for you.
If you have text and images or several images
Make sure that you put enough space (press return key twice) between different images or between image and text, so that it looks good.
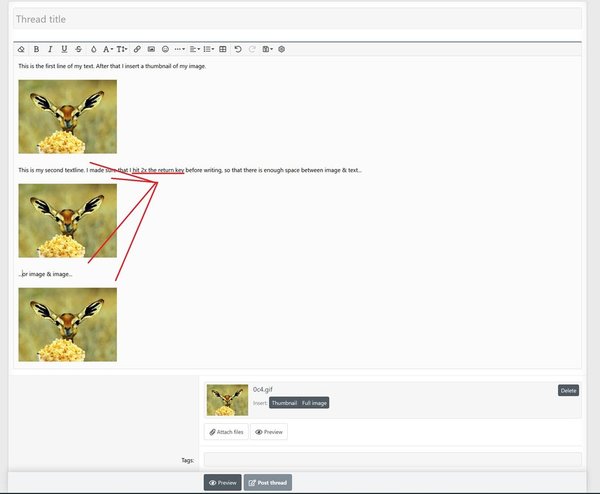
You can change afterwards still the location within your text. Just "cut" the code "Attachment" and "paste" that code in a different place within you posting.
That's all.
Enjoy it!
You can do it in two different ways. Either you embed an image from an external server (copy & paste the URL, depending on your webhoster) or you upload it with the upload functionality on our server.
A. Upload it on our server
1. Click on "attach files" below the textbox here in the forum
It looks like this at the moment:

Attention: The upload limit restrictions in KB and pixel size on the horizontal side my vary over the time. They depend on your user level, whether you are a Patron or not etc.
You can find an overview of the current settings for the different user levels here.
2. Choose in the next pop-up window the photo/photos on your PC you want to upload here
3. a) After uploading move your mouse over the image... click on the upper left hand corner of the image on "Insert...",

-------------
3. b). ...after that on "thumbnail" to display the image on that spot where the cursor was. See screenshot below.

-----------------
Thumbnails are pretty big here. Around 600 pixel at least. See below:

----------------
Now your images will be displayed at the spot you put the cursor beforehand in your posting. Hit "reply" to publish it. The forumsoftware does the resizing for you.
If you have text and images or several images
Make sure that you put enough space (press return key twice) between different images or between image and text, so that it looks good.

You can change afterwards still the location within your text. Just "cut" the code "Attachment" and "paste" that code in a different place within you posting.
That's all.
Enjoy it!
Last edited:
